


An In-Depth Guide To Setting Up Your YouTube Channel
Written by Daniel
intro.
Over the last decade, the popularity of content marketing has been rapidly gaining traction. Once considered as nothing more than the header copy within your advertising campaign, the content marketing industry is predicted to be worth an incredible $412 billion by 2021.
One of, if not the, most popular content formats right now is video. Research from marketing giant Hubspot suggests that 81% of businesses use video as a marketing tool, with this figure rising fast.
YouTube in particular has been the leading platform in terms of video content for years now. It’s currently the world’s second most-visited site after Google, according to the Alexa index. On average, YouTube attracts over one billion video views every single day – and that’s just on mobile devices. It’s so popular that literally thousands of YouTube creators earn enough to make a living out of posting videos to the platform; anything from tutorials on their favourite hobby to daily vlogs following their lives. A large majority of Fortune 500 companies also use YouTube as a content marketing channel to help enhance their online reach.
No matter how you plan to use the video platform, this step-by-step guide should come in pretty handy when setting up your YouTube channel…
Basic YouTube Channel Set-Up
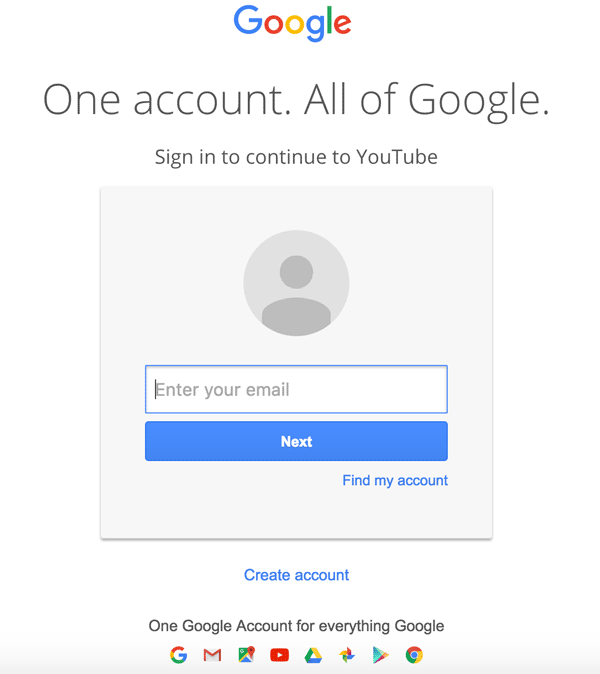
1. Before setting up your YouTube channel you’ll need to create a Google account. You need this in order to like, share and comment on any YouTube content so most people will already have one of these anyway. If not, you can set one up here.
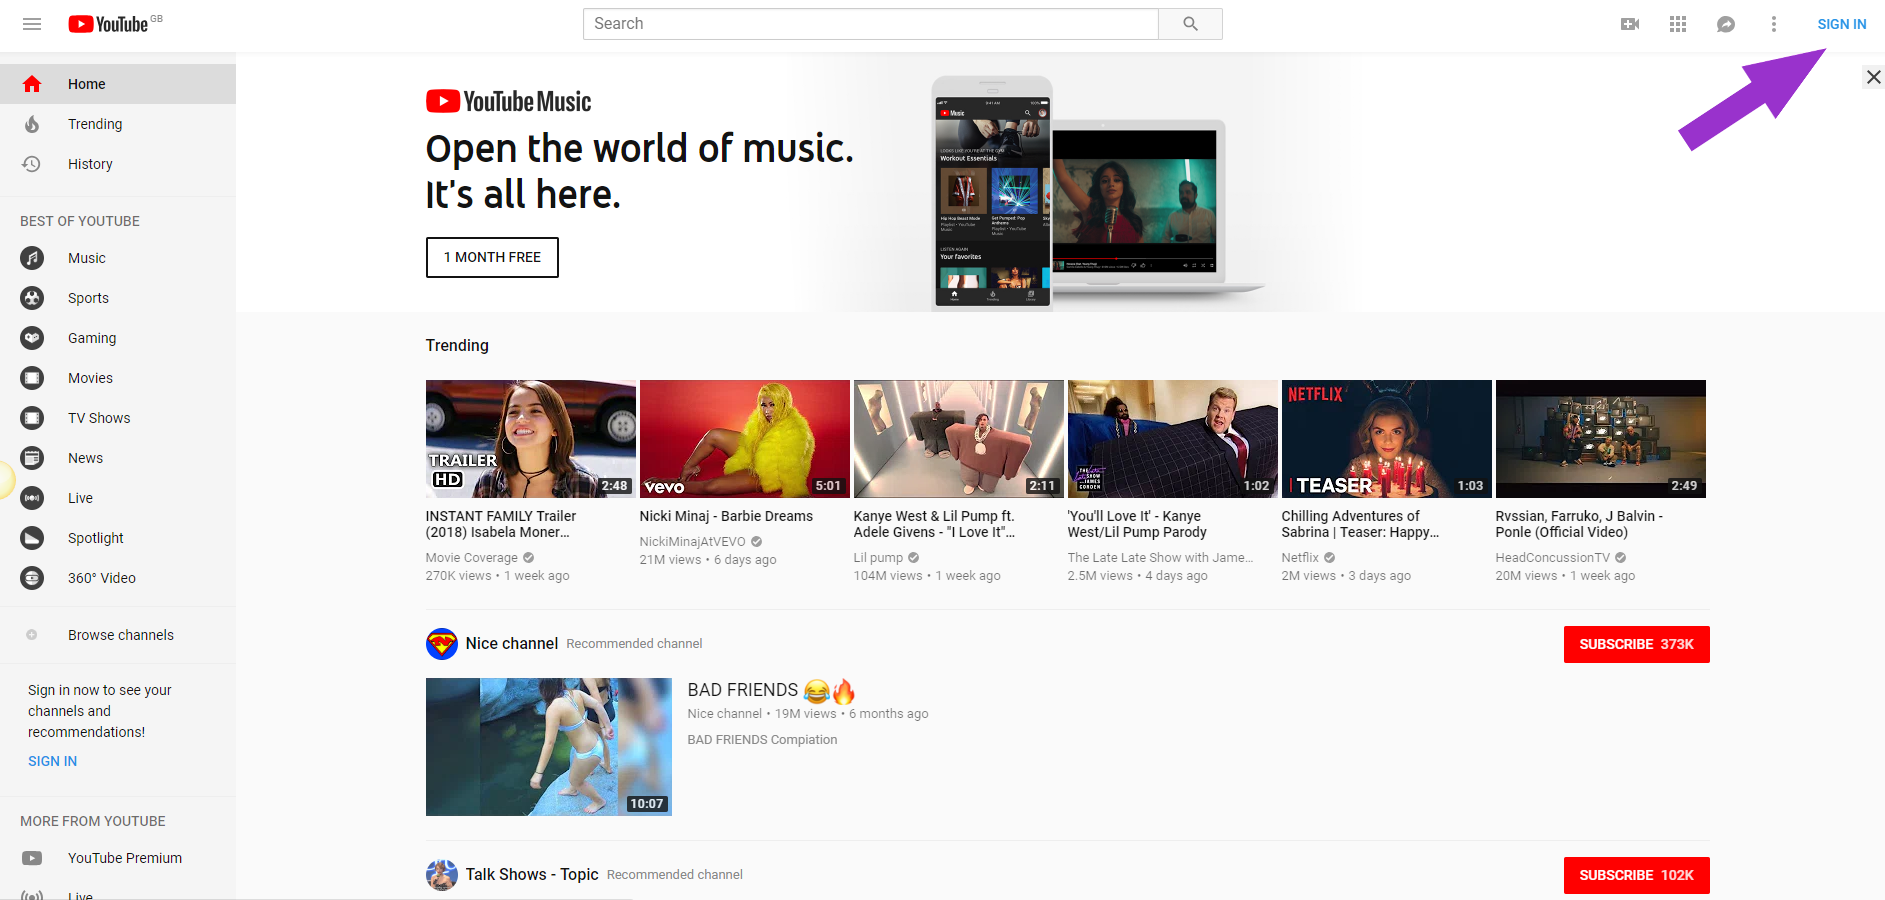
2. Next, visit YouTube and sign in using the button in the top right corner of the YouTube homepage.
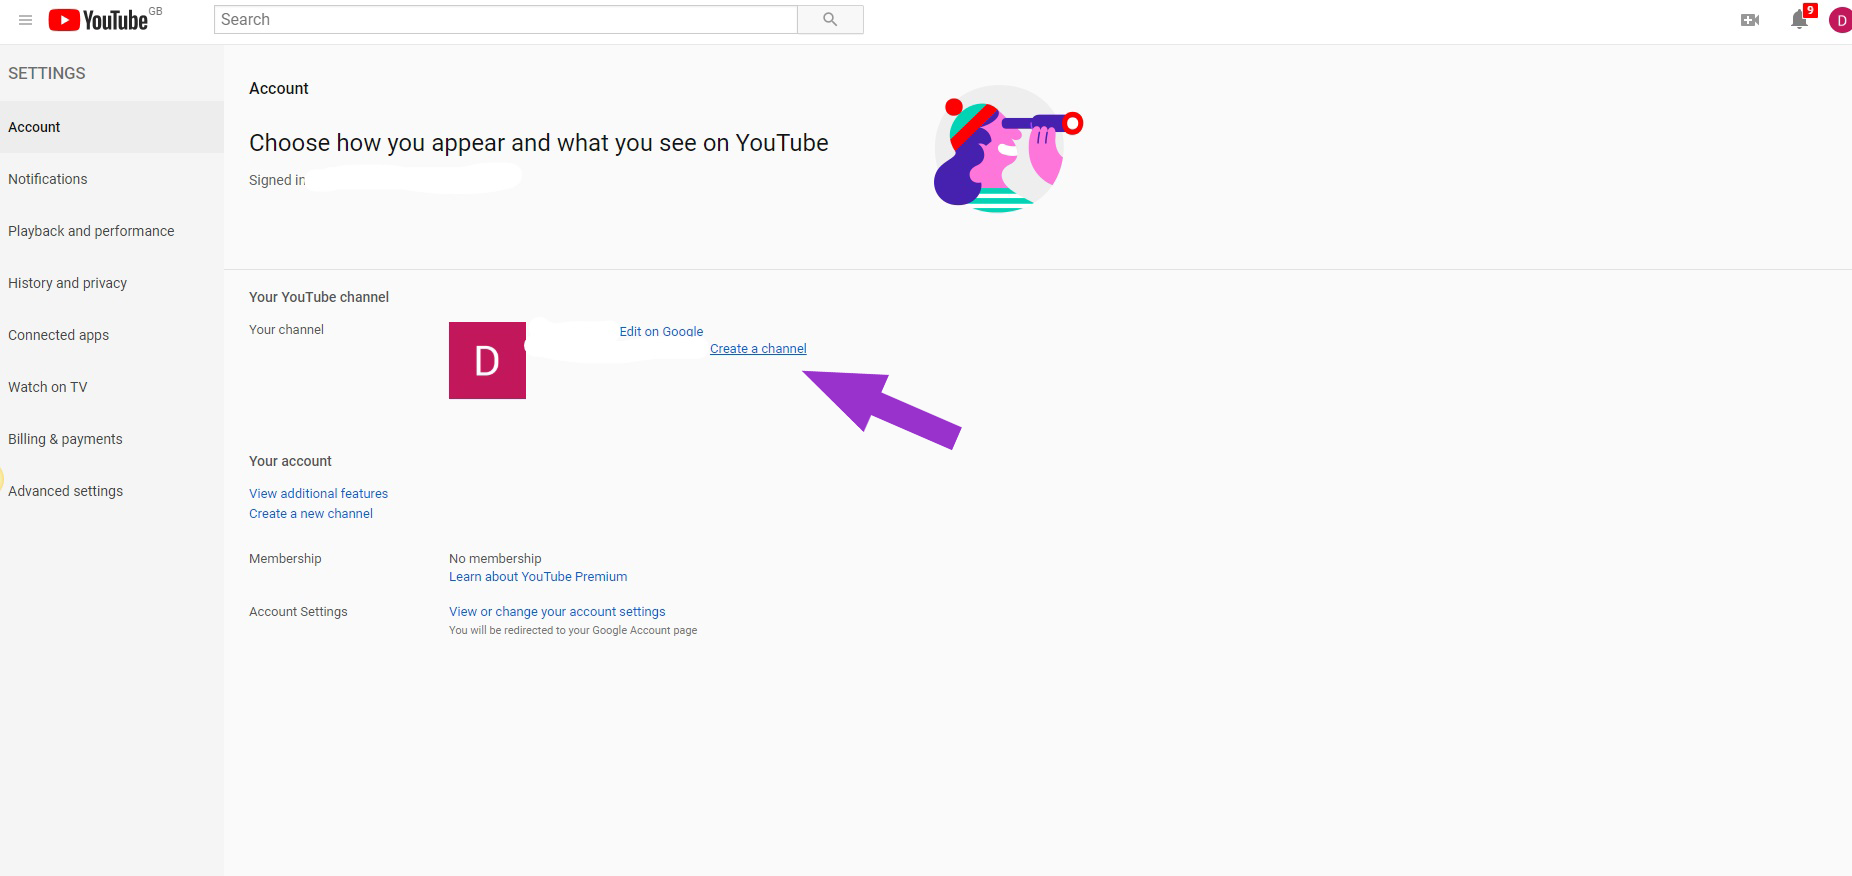
3. Once you’ve signed into YouTube, visit your YouTube settings tab. You can find this in the top right corner of the YouTube homepage, by clicking on your profile icon and then the Settings cog icon. From here, you’ll see the option to ‘Create a channel’ next to your account name. Click this and proceed to set up your channel; once you’ve filled in all the minor details you’re good to go!
How To Customise Your YouTube Channel
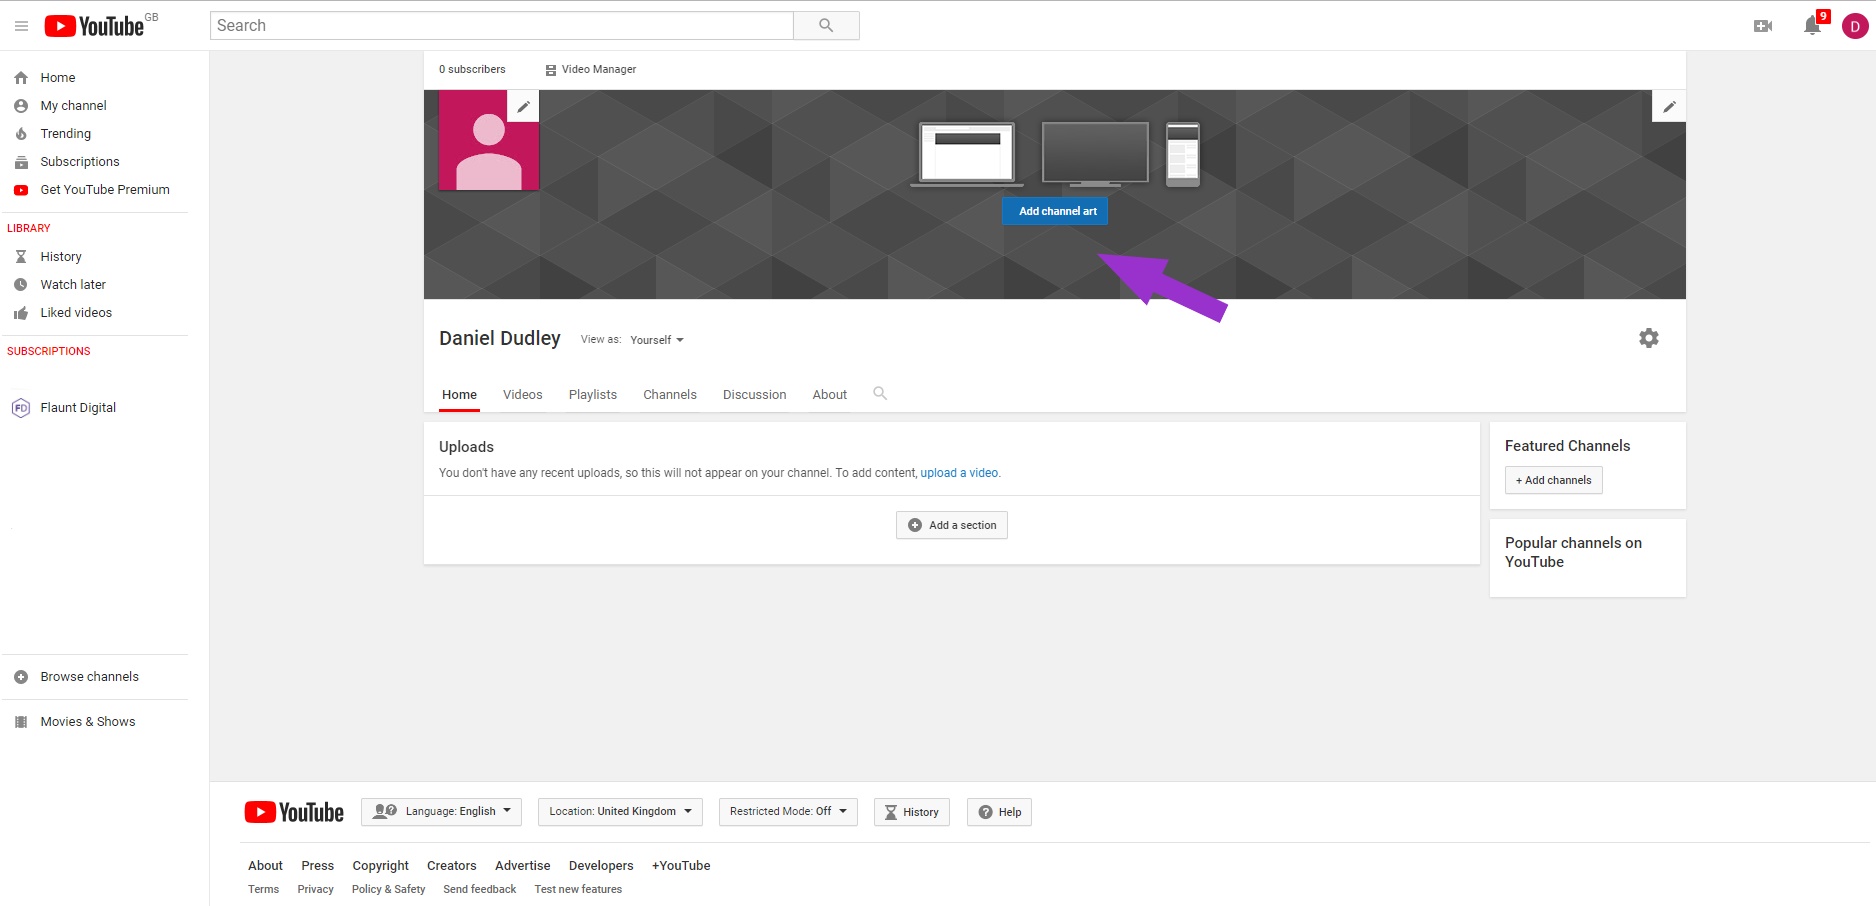
For those of you that are new to YouTube, the ‘Creator Studio’ will act as your dashboard for the majority of these next steps. Inside this dashboard, you’ll be able to find customisation tools, channel analytics, additional features and much more…
1. Add a cover image
A cover image can be a great way to reinforce your branding and give people some more context when they visit your YouTube channel. The minimum size for cover images is 2048 x 1152 pixels, with a recommended size of 2560 x 1440 pixels. You can access this feature within the Creator Studio by visiting ‘View Channel’, followed by ‘Customise Channel’.
2. Add a profile image
Within this tab, you can also customise your main profile image. Most channels simply insert a hi-res version of their logo here, but there’s no reason why you can’t be more creative if it feels right for your brand. The ideal size for this is 800 x 800 pixels.
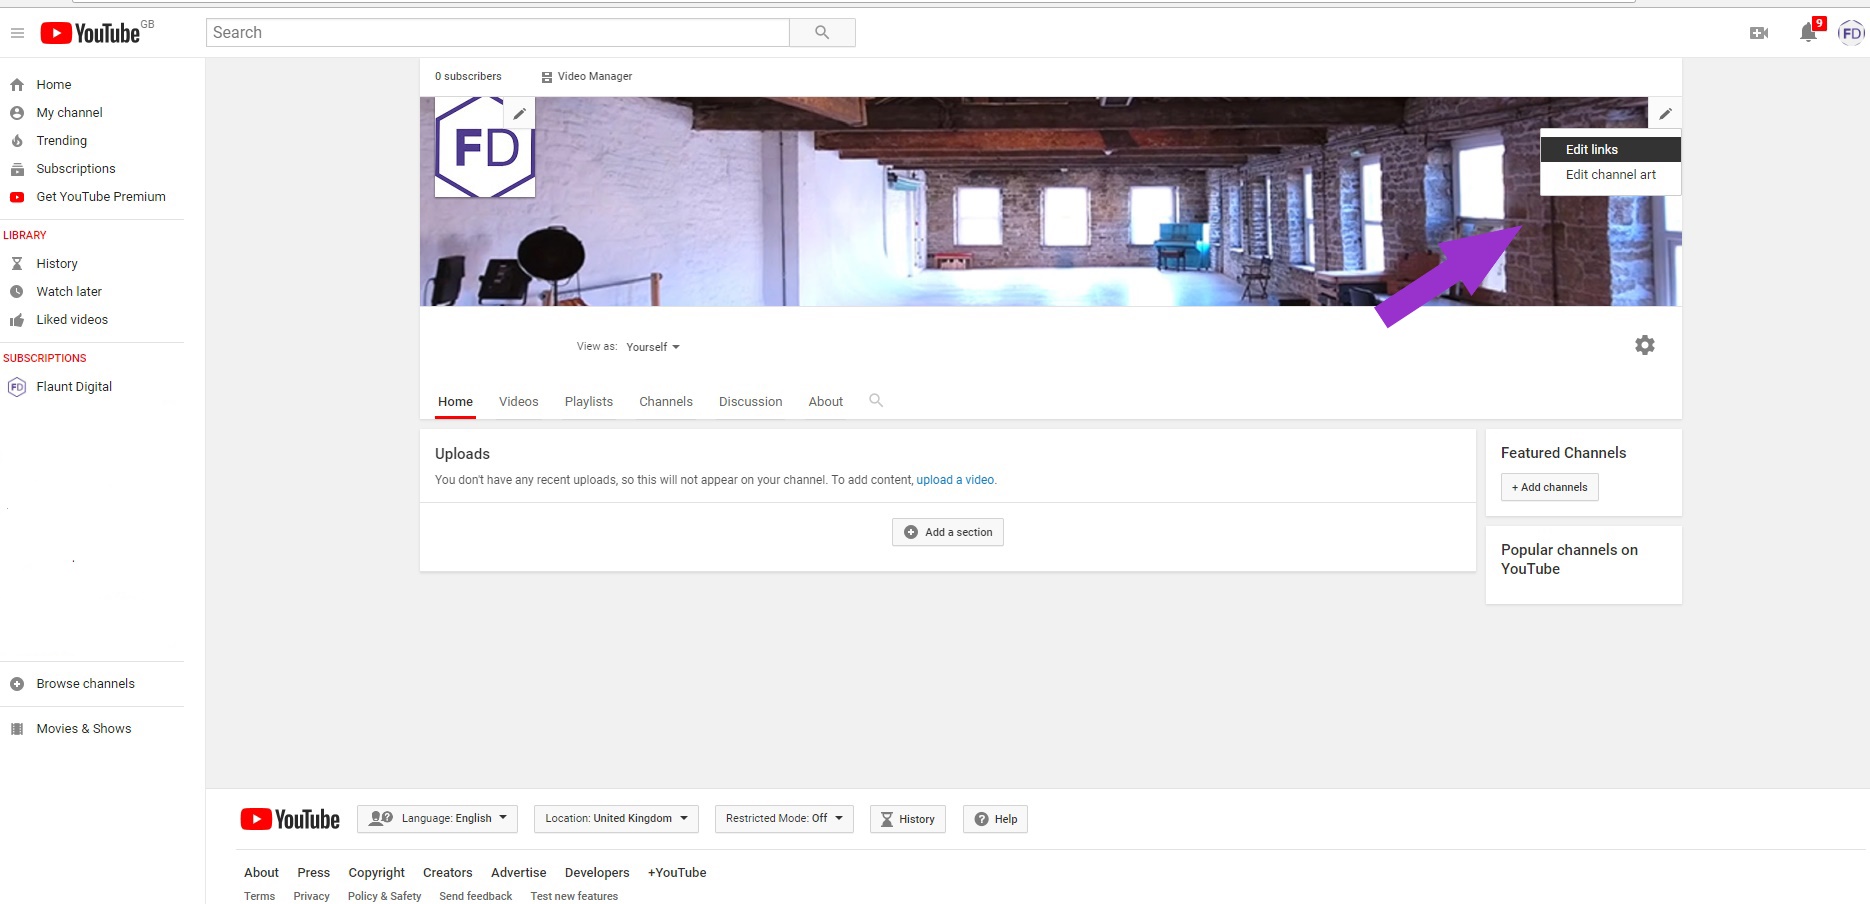
3. Add links to other social channels
Staying within the ‘Customise Channel’ tab, it could also be a good idea to add links to your other social media platforms. Click the Pen icon in the top right corner of your cover image and select ‘Edit Links’. From here, you’ll be able to add links for up to five different websites. We’d usually recommend including a link to your website, along with your four primary social media platforms.
4. Select your channel features
Depending on a variety of criteria, ranging from your subscriber count to monthly channel views, you may be eligible for certain YouTube features. These features include channel monetisation [making money by displaying ads on your videos], live-streaming, being able to share videos that are longer than 15 minutes and more.
Access this tab by clicking on ‘Channel’ and then ‘Status and features’, within your Creator Studio dashboard. From here, you can choose to enable any of the features that you may deem relevant. Just to note, you will also need to verify your YouTube account with your phone number before accessing the majority of these features.
5. Consider branding your videos
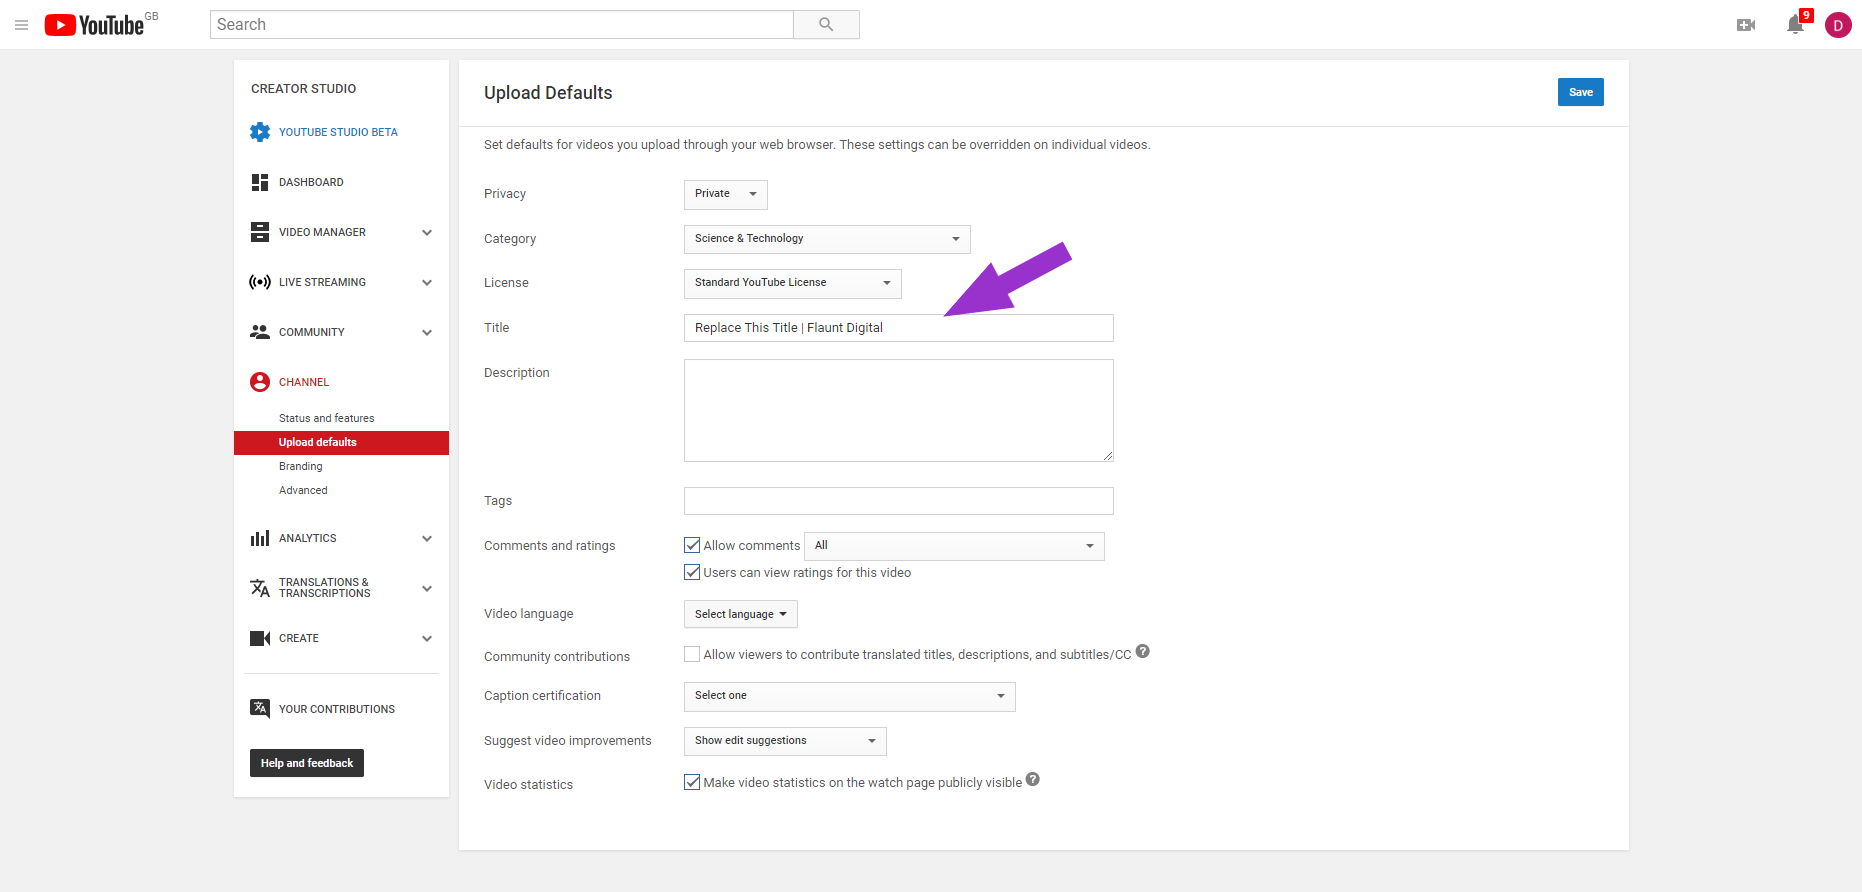
The next section in the ‘Channel’ tab allows you to select a range of upload defaults. The first of these is your default video title. You may not think this option is relevant for you, but there’s one easy trick that can add an additional layer of branding to your videos; simply adding your brand name at the end of the title. This may not be entirely appropriate if you have a particularly long brand name, but even so it’s something to consider. We upload all our videos with the title format ‘Example Title | Flaunt Digital’.
6. Add a custom description
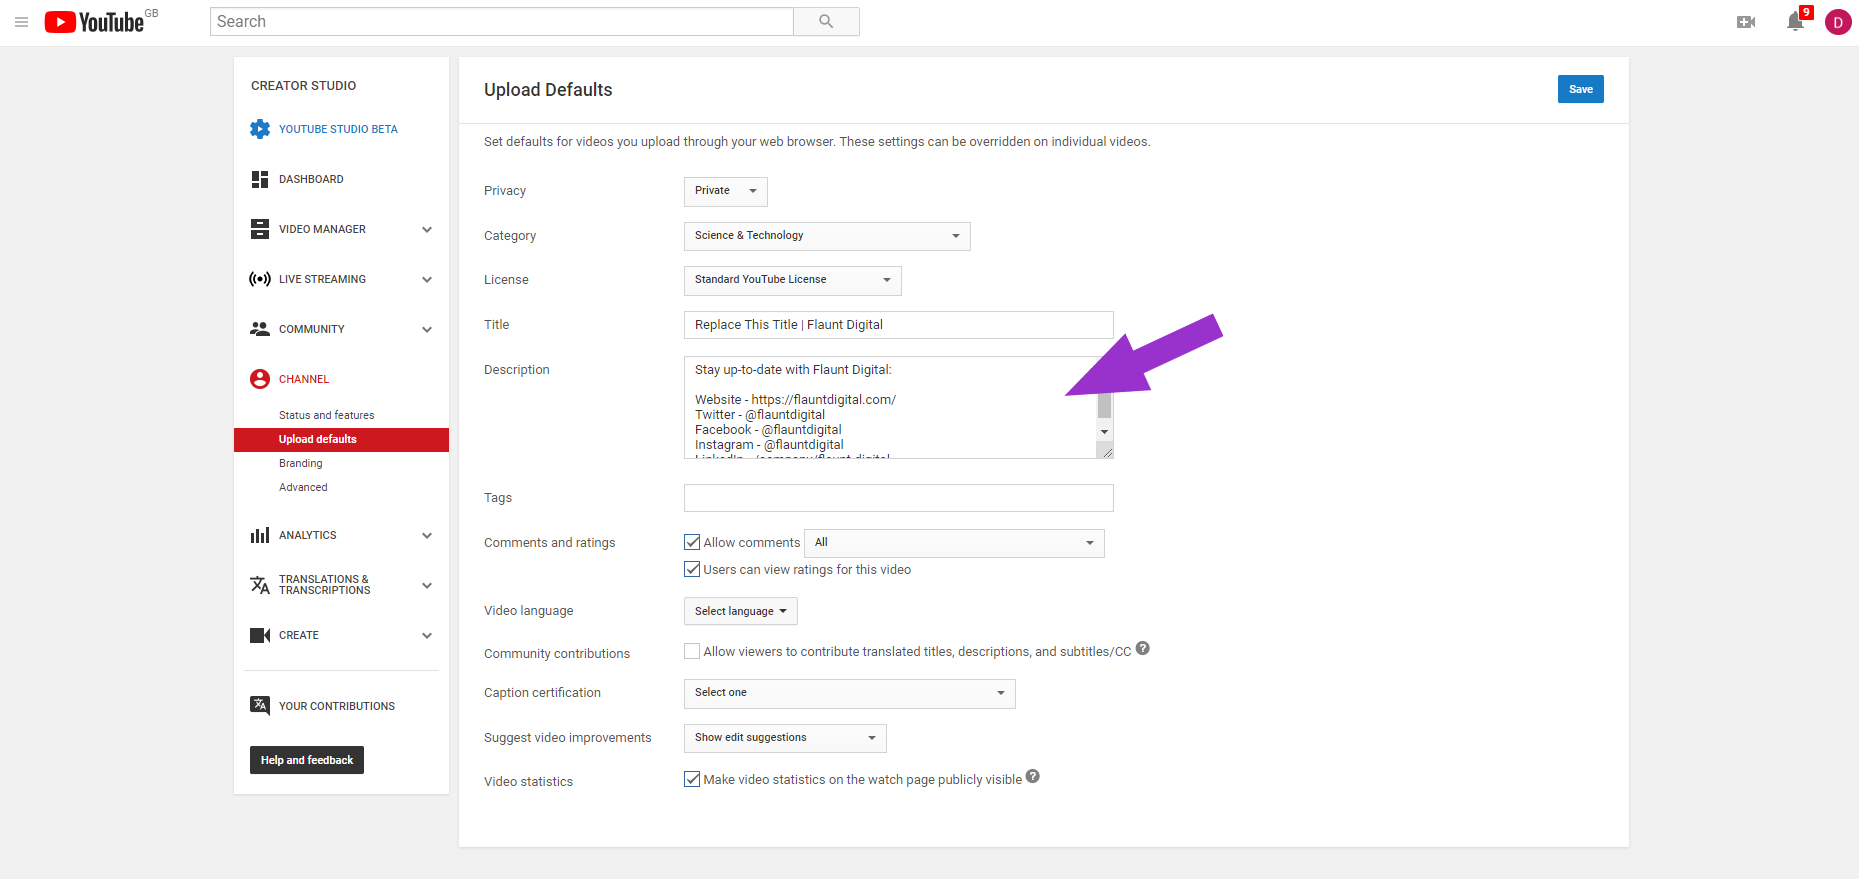
Below the default title, you’ll find a box that allows you to create a custom description. This can be a huge timesaver, meaning that you don’t need to copy-and-paste your description every time you upload a new video. In our custom description, we include links to all of our social profiles. This means that each time we go to upload a video, all we need to do is add a quick one-liner giving some context to that specific video.
7. Add custom tags
The final part in the ‘Upload Defaults’ tab that you’ll probably find useful is the ‘Tags’ section. This allows you to add ‘Tags’, i.e. keywords, that describe your channel and/or videos. For example, here at Flaunt Digital we include ‘Digital’, ‘Digital Marketing’, ‘Leeds’, ‘Flaunt Digital’ and ‘Digital Agency Leeds’. Make sure to separate your keywords with commas (,) or speech marks (“).
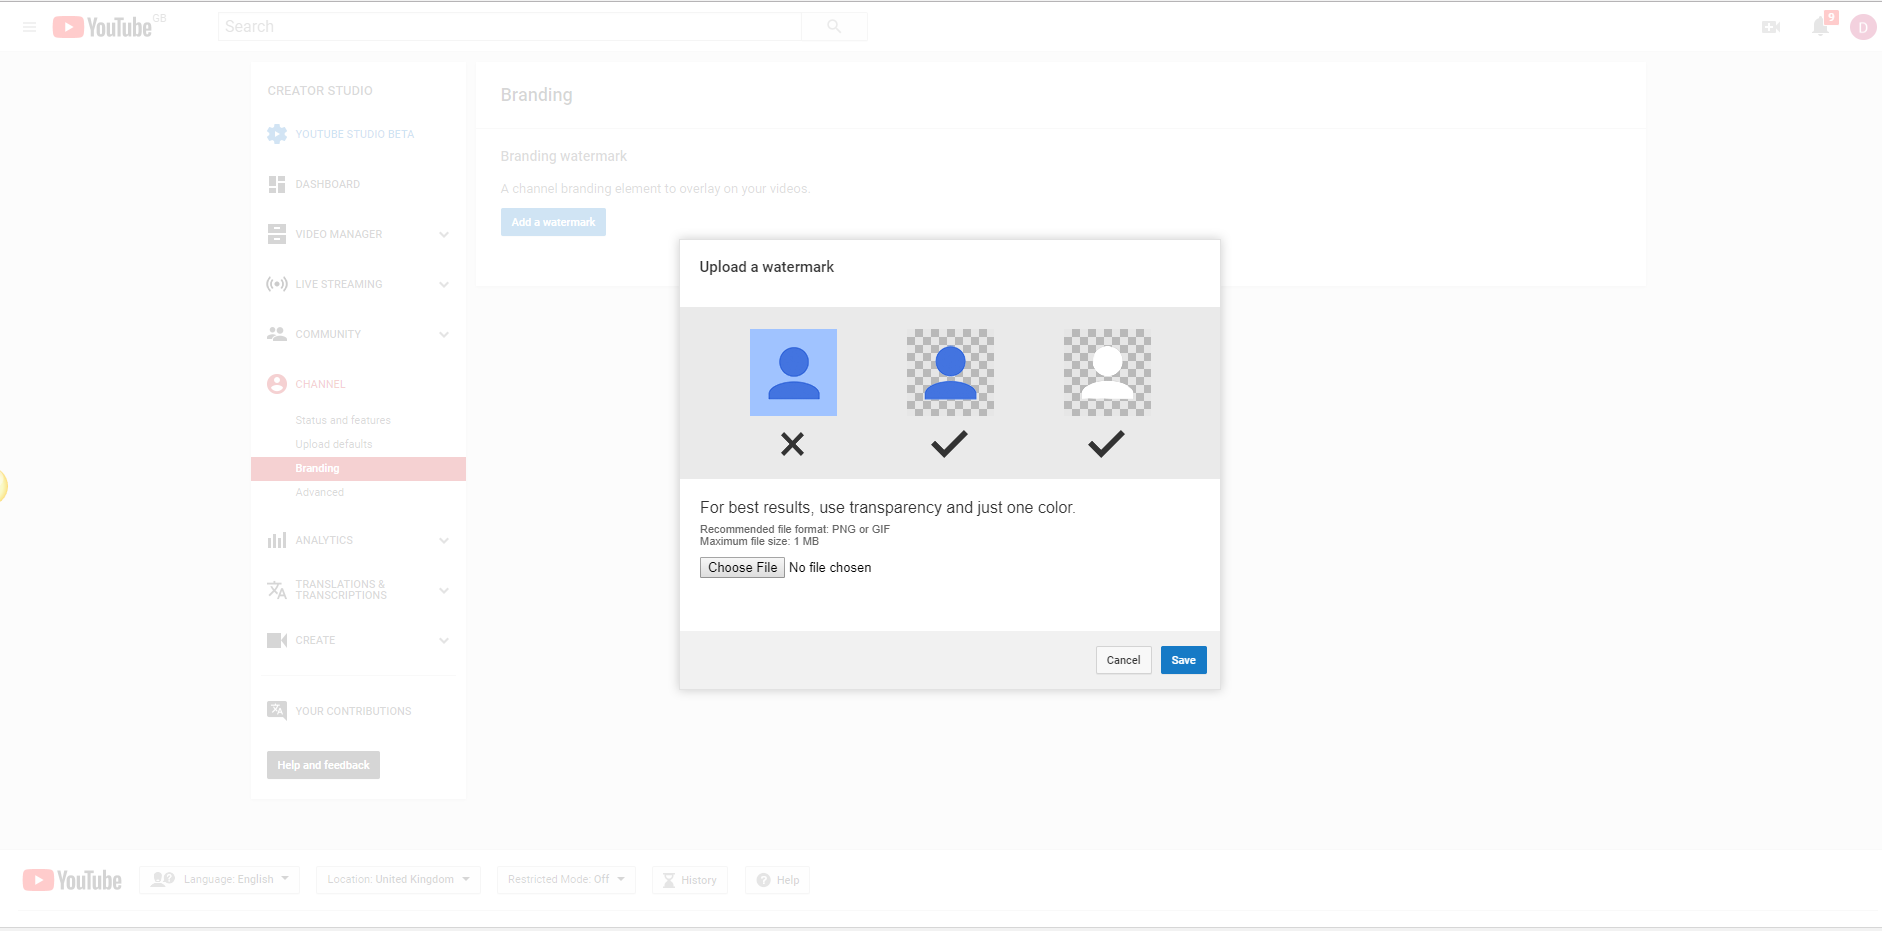
8. Add a watermark
The next step in customising your channel is adding a watermark to your videos. This is a small, slightly transparent image that will appear in the bottom right hand corner of all your videos. In most cases, channel owners simply include their logo to further reinforce the channel’s branding. But some creators use this in more creative ways, for example having the watermark as a ‘Subscribe’ button and using it as a call-to-action.
9. Create a channel trailer
Subscribers and non-subscribers see your channel differently when clicking on to your ‘Home’ tab. You can see these different views by navigating to ‘Customise Channel’ and then selecting either ‘For returning subscribers’ or ‘For new visitors’. In brief, your ‘Channel Trailer’ acts as an introduction to your channel for any non-subscribers.
Some channels put together a video specifically for their channel trailer, whereas others will simply use their most suitable video as a channel trailer. At Flaunt Digital, we felt that a custom channel trailer may not be entirely relevant, so we’re currently just using our showreel from last year.
10. Create eye-catching thumbnail templates
One really effective way to add a more professional feel to your YouTube channel, whilst reinforcing your branding at the same time, is to use custom thumbnails. This can be fairly easy to implement, but it massively depends on your upload pattern. If your channel consists of videos that mainly follow a similar structure, then you could create a custom thumbnail for each of your different series. You can fill in any gaps with unique thumbnails, simply presenting the video title in an eye-catching manner. Check out Siege Media’s YouTube channel for an example of this done well.
If you follow these steps then setting up your YouTube channel should be a fairly straightforward task. And if done correctly, the results can be incredible. After setting up our YouTube channel we saw a 65% boost in website traffic and a whopping 1840% increase in social media engagement…and that was just after the first month!
Nine months down the line and our website traffic is up 115%, our social media profile visits are up by 1,094% and we’re getting an additional 1,000+ views of our onsite blog every month…
Want to discover more digital marketing tips and tricks? Why not sign up to our mailing list for all the latest insights from Flaunt Digital?


